The web platform is the delivery mechanism of choice for a ton of software these
days, either through the web browser itself or through Electron, but that doesn’t mean
there isn’t a place for a good old fashioned straight-up desktop application in the
picture.
Fortunately, it’s easier than ever to write a usable, pretty, and performant desktop app,
using my language of choice (Rust) and the wildly successful cross-platform GUI framework
GTK. In this blog post, we’ll walk through the source code of gDiceRoller.
In future posts, I’ll explain how I packaged it for different systems.
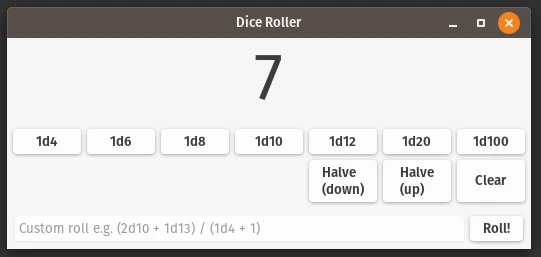
A screenshot of gDiceRoller, the program this post is about.
What App?
gDiceRoller is a truly simple app. It leverages the excellent rfyl
dice notation
library to allow users to roll dice of arbitrary numbers of sides and perform arithmetic
on the results.
Several polyhedral dice of the type commonly used for gaming.
Dice notation is the de facto standard notation used by tabletop gaming systems such
as Dungeons and Dragons to express how many and which kind of dice a player should roll to
determine what happens in a game. A roll is expressed as NdM, where N is the
number of dice to be rolled, and M is the number of sides each die should have.
Dungeons and Dragons is known for using an icosahedron, or d20, for many of its
rolls. When determining the effects of attacks in combat, it’s common to roll 2d8 or
more, and in older editions of the game it was possible to build up truly complex sets
of rolls, like 1d20 + 1d6 - (1d4 / 2) for a skill check or 12d6 + 2 for some
damage rolls.
The most common dice are those that correspond to the platonic solids; tetrahedrons (d4),
cubes (d6), octahedrons (d8), decahedrons (d10), dodecahedrons (d12), and
icosahedrons (d20). People also like to roll two d10s and use the first as the first digit
and the second as the second digit to make a makeshift “d100”, for percentages.
This application will allow its users to generate pseudorandom numbers based on parameters
specified in dice notation, or by clicking on any of the several common dice provided, as
well as permitting common operations like halving results with specific rounding behavior.
That’s it - it’s quite simple!
UI Prototyping
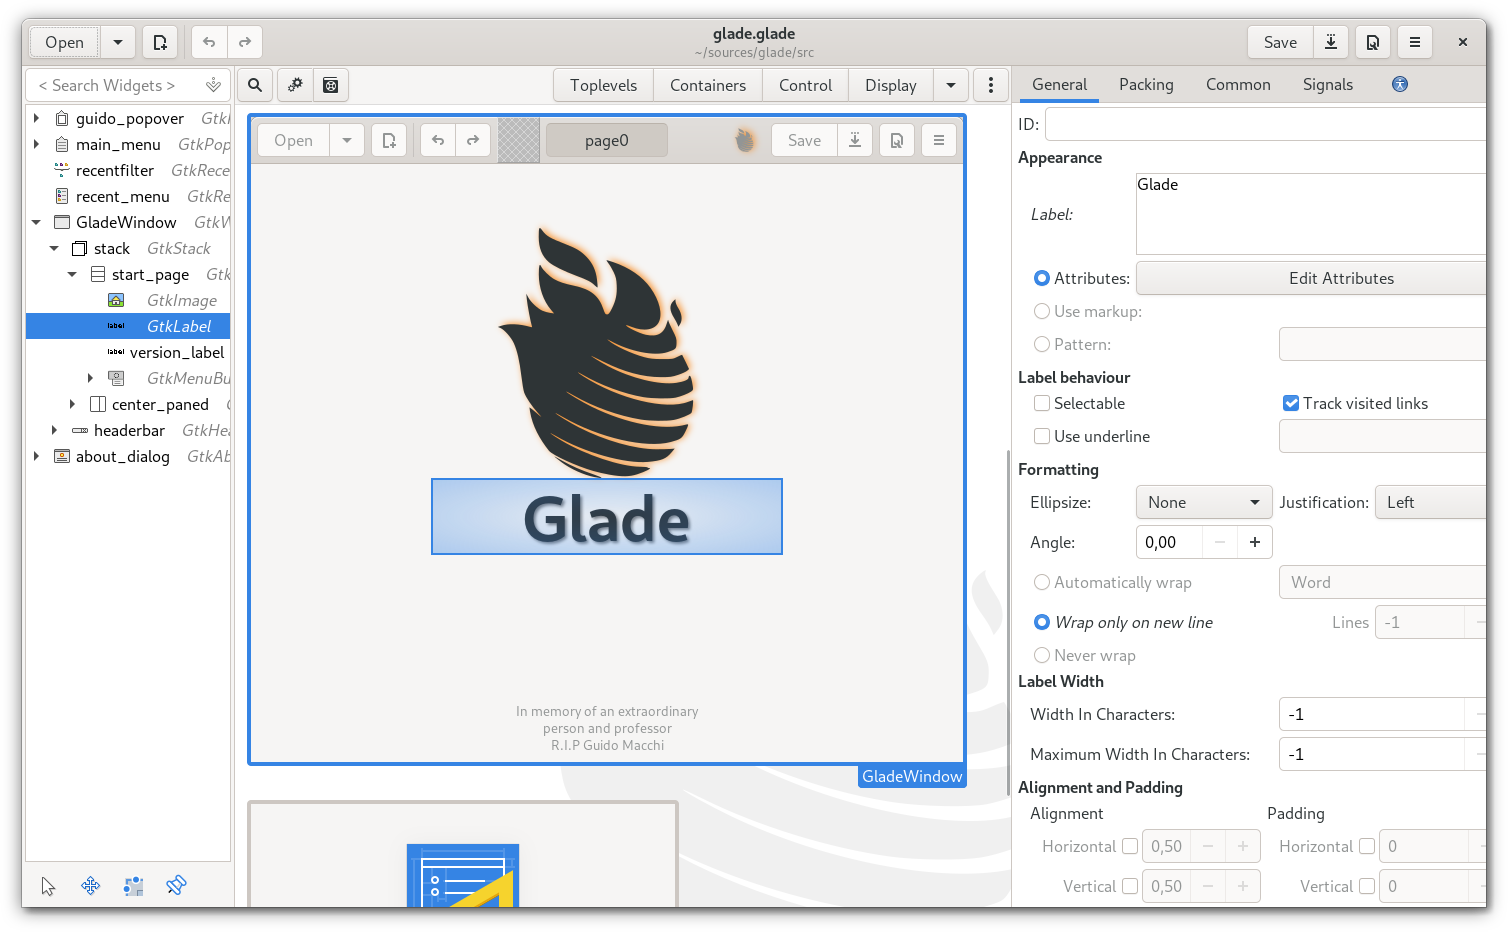
Glade, from the GNOME project, is easy to use and very powerful.
Given the simple interface for this program, it would be fairly easy to build the entire
interface from within Rust code, but such an approach becomes unwieldy for larger
projects. Fortunately, the GNOME project provides a best-in-class UI design program called
Glade (available from your distribution or at glade.gnome.org).
Glade is pretty intuitive; I suggest picking up the UI definition for this project and pulling it up yourself.
This is an XML-based file that defines the tree structure of the user interface, much like
HTML does for web applications. (If you want to deep-dive on Glade, check out the
dedicated tutorial series from the GNOME project.)
Glade’s killer feature, in my opinion, is its “preview snapshot” functionality, which
opens the current UI definition in an actual native window. This lets you play with
any standard UI functionality like notebooks (tabs), scroll bars, and tree views without
writing any code at all.
Because it’s a tree structure, you can prototype fragments of the UI, like complex list
entries or modals, in their proper place and then simply drag-and-drop them into their
own tree to be used in the program once they look good.
Once the UI looks great, just save it for later. Integration into gtk-rs, the Rust GTK3
bindings, is very easy.
Dependencies
Note: from this point on, anywhere you see codes.nora.gDiceRoller or gDiceRoller,
you will need to use your own project’s name. I would have
called the crate codes.nora.gDiceRoller, in standard reverse domain notation used in
many packaging systems, but that’s not permitted, so I simply called it gDiceRoller.
All you need to start writing this code is a working cargo installation and the GTK
development libraries. On Ubuntu, that’s libgtk-3-dev.
Within the Cargo.toml, the dependencies are actually pretty simple; we need GTK, GLib,
and RFYL (which handles the dice rolling).
With GTK, we have to specify a feature corresponding to the minimum toolkit version the
program will support, through the use of cargo feature tags.
This project deliberately uses an old version for maximum compatibility, but you’re free
to choose whatever you want.
Thanks to @federicomena for help refactoring
this program to be easier to read.
gDiceRoller is an example of an easy-to-use factorization template for any GTK Rust
application. It keeps its application logic, state management, and GUI management in
seperate modules, and uses the main() function to tie them together.
Rolling Dice
The most important thing this program does is to roll dice - that is, take a string of
dice notation and generate a number from it. All of that logic is provided by rfyl, and
it’s only really necessary to have a single function that handles the whole process.
That’s roll_expression; it lives in src/rolls.rs
and takes a string, passes it to rfyl::roll, and returns either the result or an error.
Putting this logic in its own file also gives us an obvious place to do some basic tests.
State Management
Then there’s the application’s state to think about. For gDiceRoller, that’s simple. It
stores the last rolled value and, if there was a problem with the user-entered dice notation,
what caused that error.
Whatever your application’s global state is, it can go in its own module, state. In
gDiceRoller, that’s a single file src/state.rs, and it contains the actual state
as a State struct with functions to operate on it. These functions are what the rest of the application will use to change the state, and they take an &mut self. In gDiceRoller, there’s
just one; the application does sometimes directly change the value inside, but the only
complex behavior is encapsulated in update_from_roll_result, which is tested in the same
file.
GUI Handling
Now comes the actual “front-end” portion; the GUI. In gDiceRoller, all the handles into
the UI are contained in a single struct, MainWindow, in `src/main_window.rs’
In the new() function for this struct, the include_str!() macro is used to load the
Glade template file. I just saved it in the src/ folder and did include_str!("mainwindow.glade").
Then, each element of the struct is initialized with builder.get_object("objectName").unwrap().
This takes these objects from the stringly-typed world of the XML file to their exact types
in the MainWindow struct.
The exception to this rule is the buttons. There are a lot of buttons, and they all do the
same thing with a minor variation, so a for loop is used to run through a slice of all the
names and add them to a HashMap<String, gtk::Button>. It doesn’t provide quite the same
compile-time guarantees, but at least get() on that HashMap returns a gtk::Button
rather than an arbitrary GObject.
The MainWindow struct also has a separate run-time function, start(), which sets
the application’s name, its wmclass, and its delete event, and shows it and its children.
Finally, MainWindow has a function update_from which takes an &State and changes all
the visible fields to their appropriate values. In this case, that’s just showing the
error popover if there’s an error, and updating the number displayed at the top.
This is all the data structures in use; the rest of the work is done in main.rs.
Functionality
main.rs functions as something of a plugboard, wiring together the actual computation
with the State and MainWindow structs, and starting the whole thing rolling.
The program first tries to initialize GTK.
Then, the GUI state and the application state are initialized and placed in Arc<> and
Arc<RefCell<>>, respectively. State can now be safely modified from within callbacks,
thanks to RefCell’s interior mutability (see Section 15.05 in The Rust Programming Language
for more information on this pattern).
RefCell and RwLock are both good candidates for use as the
interior-mutability abstraction here. RefCell is used in this case because there is no
need to share between threads, and RefCell has less complexity than RwLock. Mutex is
also a viable candidate, or a custom data structure using std::sync::atomics.
The use of Arc instead of Rc is unnecessary here, since the program is single-threaded.
This is an error on my part; the data structure should be Rc<RefCell<T>> or
Arc<Mutex<T>>/Arc<RwLock<T>>. This will be corrected soon.
After that, main just needs to add all the callbacks for the various buttons. All the
standard dice can be done with a loop. Those for clearResult, halveDownResult, et
cetera are done on their own.
There’s a pattern to these callbacks. Firstly, each callback is created in its own local
scope, so as to make lifetime juggling easier. Then, the appropriate control is fetched,
and Arc::clone() is called on &gui and &state to get a local reference to the
global state. Finally, the actual code is written in a move closure, so these references
are captured.
For example, the clearResult callback is written thus:
Finally, main calls gui.start() and gtk::main() and the program runs!
You can run the tests with cargo tests, or actually run the program with cargo run.
Putting the “Desktop” in “Desktop App”
Just a pretty GUI and speedy functionality aren’t enough, though;
a good desktop app needs integration. The most basic integration, on the Linux desktop,
is provided through a .desktop file and an application icon. In addition, applications
can provide an appdata.xml file describing their features and history. All of these
files are held in the data directory, in the case of gDiceRoller.
[Desktop Entry]
Name=Dice Roller
GenericName=Dice Roller
Comment=Roll dice of many different shapes and sizes in all possible combinations.
Categories=Game;GTK
Icon=codes.nora.gDiceRoller
Exec=codes.nora.gDiceRoller
Terminal=false
Type=Application
This format is well documented, and supports a lot of nice features like translations. It should be placed in
/usr/share/applications/ or somewhere similar (depending on distribution).
You’ll notice that the Icon field uses the same name as the application’s full ID. That
is because the icon can also be installed on the system. gDiceRoller provides an SVG
icon which can be scaled to any size, as well as raster icons at 64x64 and 128x128
resolutions. These are placed in /usr/share/icons/hicolor/<size>/applications. These
icon names can then be used to set the window’s icon in the Glade file as well.
GTK and desktop environments automatically find icons by name, but it’s sometimes
necessary to refresh their cache before they can actually find new icons.
All of this is getting kind of complex. Time to introduce: the build system!
The Build System
The build system, in this case using make, lets us easily install and uninstall
the program from a system.
So, why did I use make? Well, it’s really simple and pretty much just does what
I want, and gets out of the way. In addition,
using a make-based build makes it easier for other distributions to package the project
in the future. Here’s the whole Makefile I used during early
development, which will act as the template for the rest of the project.
# Just tell make that clean, install, and uninstall doesn't generate files
.PHONY: clean clean-all install uninstall

# Build the application
target/release/gDiceRoller : src
    cargo build --release

# Install onto the system
install : target/release/gDiceRoller
    # Install the binary
    cp target/release/gDiceRoller /usr/bin/codes.nora.gDiceRoller
    cp data/codes.nora.gDiceRoller.desktop /usr/share/applications/codes.nora.gDiceRoller.desktop
    cp data/codes.nora.gDiceRoller.svg /usr/share/icons/hicolor/scalable/applications/codes.nora.gDiceRoller.svg

# Remove from the system
uninstall :
    rm -f /usr/bin/codes.nora.gDiceRoller
    rm -f /usr/share/applications/codes.nora.gDiceRoller.desktop
    rm -f /usr/share/icons/hicolor/scalable/applications/codes.nora.gDiceRoller.svg

# Rebuild from scratch
clean-all : clean
    cargo clean

# Does nothing, yet
clean :
    true
With this Makefile, it’s possible to simply:
make
sudo make install
and have a totally working installation. To fix a few issues with the system not picking
up on the new icon, adding touch /usr/share/icon/hicolor to the install target after
installing the icon does the trick.
Then, if you want to remove the program:
sudo make uninstall
NOTE: This Makefile is incomplete; please check out the one used by the actual project
as a better template here
and/or wait for the next post to explain all the aspects of that Makefile.
Conclusion and Recap
gDiceRoller isn’t a groundbreaking application, but I hope it demonstrates how easy it is
to make useful, non-web-based software. I only showed how to install the software on a
dev machine, but in the next few posts, I’ll look at Flatpak, Snap, .deb packages, and
even Windows packaging. GTK is a cross-platform toolkit, after all!
 A screenshot of gDiceRoller, the program this post is about.
Several polyhedral dice of the type commonly used for gaming.
 Glade, from the GNOME project, is easy to use and very powerful.